how to make illusion table with design
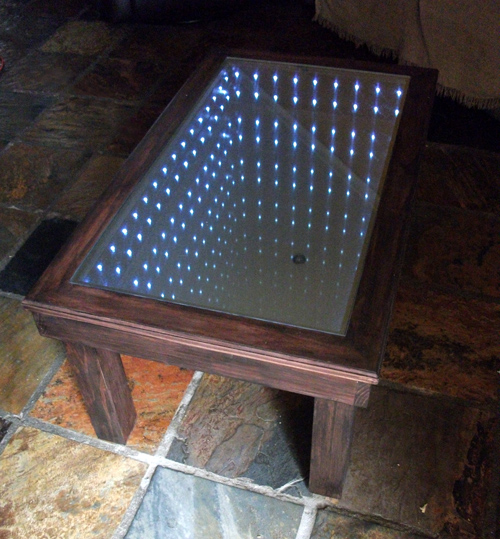
 Stare into infinity…
An infinity mirror is an object that incorporates the reflection of light inside a mirrored box to produce a quite spectacular illusion.
The illusion is obtained when bouncing light between two reflective surfaces while one of these surfaces is slightly transparent. The transparent surface allows the observer to view this movement of light from outside the box and so creating the illusion of staring into infinity.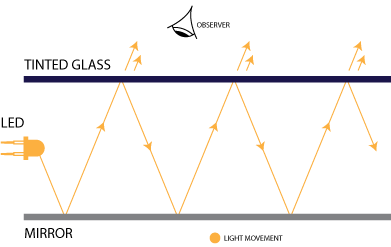
In this Woodwork Junkie tutorial, we will be using this illusion to build an infinity mirror coffee table.
Note, this project incorporates an electrical component.
Tools you will need:
- Saw for cross cuts and miter cuts (Ideally a miter saw)
- Router with 1/2″ wide straight bit and 1 profiled bit for edge (optional)
- Drill with bits
- Jigsaw
- Power sander/s
- Glue gun

The material you will need
We always encourage our readers to place their own spin on things.
Don't feel limited to these dimensions, build it your way.
Wooden components:
- 1 x 3 (19 x 64mm) for top frame and box
2 x 19-3/5″ (500mm)
2 x 35-2/5″ (900mm)
2 x 21-3/5″ (550mm)
2x 36″ (910mm) - 2 x 3 (38 x 64mm) for table legs
4 x 15-7/10″ (400mm)
4 x 13-1/5″ (335mm) - 33-4/5″ x 19-3/5″ (860 x 500mm) Fiberboard 3/4″ thick
- A sheet of 1/4″ thick fiberboard
Infinity components:
- 1/4″ glass for table top
- Mirror
- LED strip
- Mirror tint
Step 1 – The Box

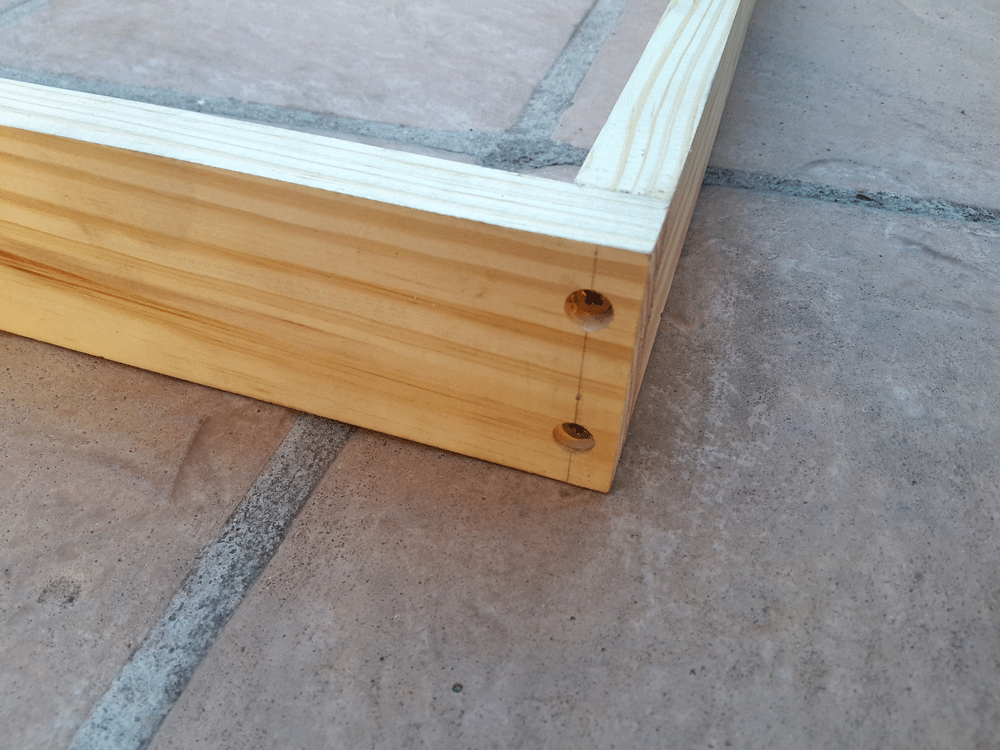 Cut 4 planks (1 x 3 – 19 x 64mm ) and assemble using countersunk screws.
For the tutorial, we used 2 x 19-3/5″ (500mm) and 2 x 35-2/5″ (900mm)lengths and assembled as shown.
Ensure the frame is square by checking it with a framing square and measuring it from corner to corner. (Top left-hand corner to bottom right as well as top right to bottom left should be the same distance)
Once squared fill the holes with a matching wood filler and sand the outside of the box.
Step 2 – The legs
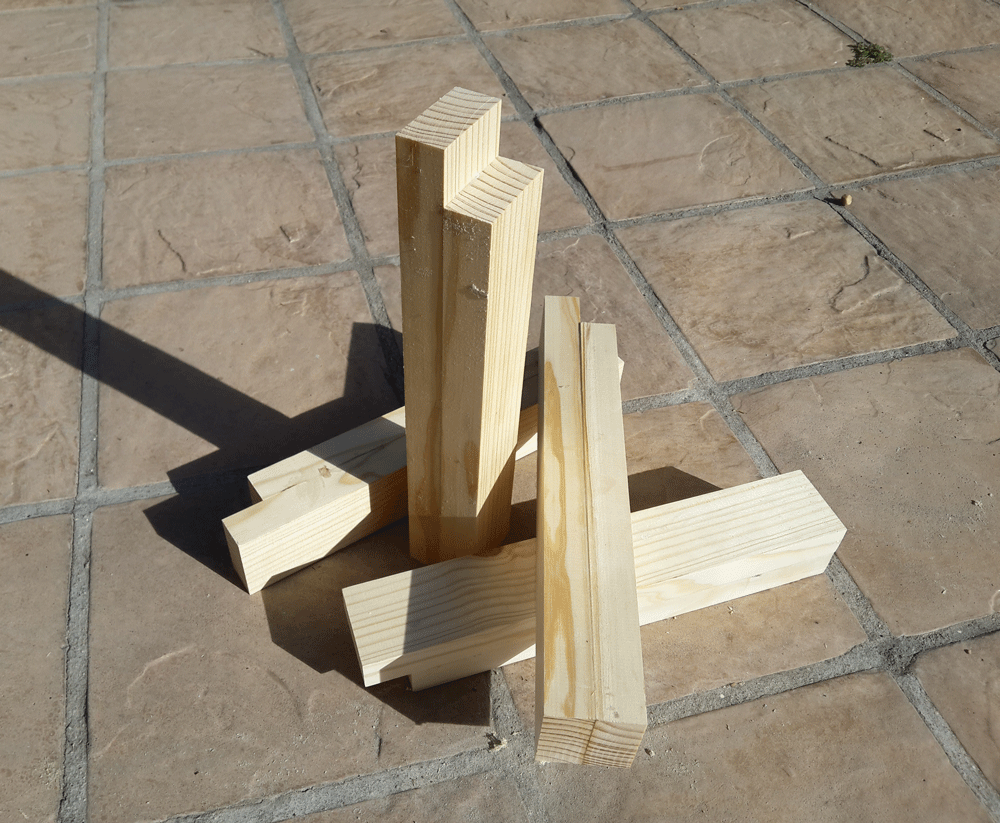
 The legs are made using 2 x 3's (38 x 64mm)with each leg being made up of two pieces glued together. Of these two pieces, one will be cut at the desired height of the table (in this case 15-7/10″ or 400mm ) while the second should be the width of the 1 x 3 shorter that the other (64mm). This means when the legs are fitted the shorter pieces should sit flush with the bottom of the box.
If at it's hard to envision this refer to the next step for clarity.
Glue these two planks together and after the glue has cured, sand for a flush finish.
Step 3 – Assemble legs and box
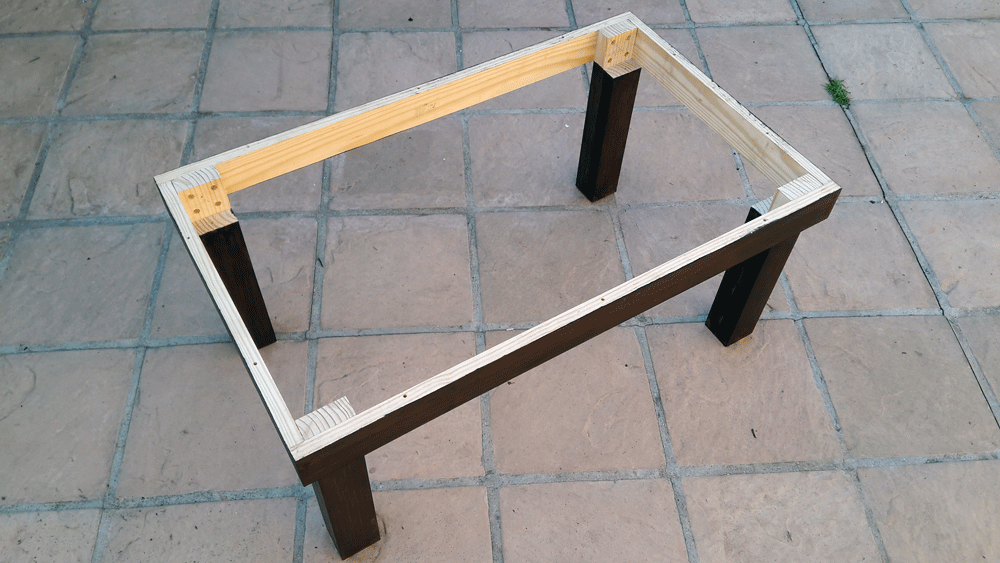
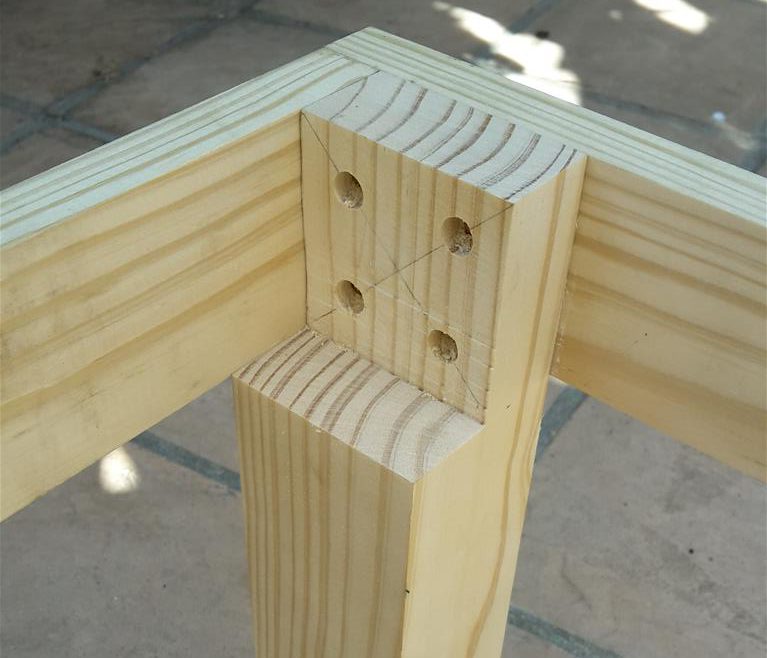 Fit the four legs to the inside of the four corners of the box as indicated by the above image.
The legs are fitted using four screws per leg. Again countersinking the screws.
On each leg, the longer piece of wood should sit flush with the top of the box while the shorter one should sit flush with the bottom.
After fixing the legs you can treat the wood in any way you see fit.
We went with a dark teak wood stain.
Once this step is complete you will have a standing frame. Everything from here will be fitted to this frame.
Step 4 – Fit the base and mirror
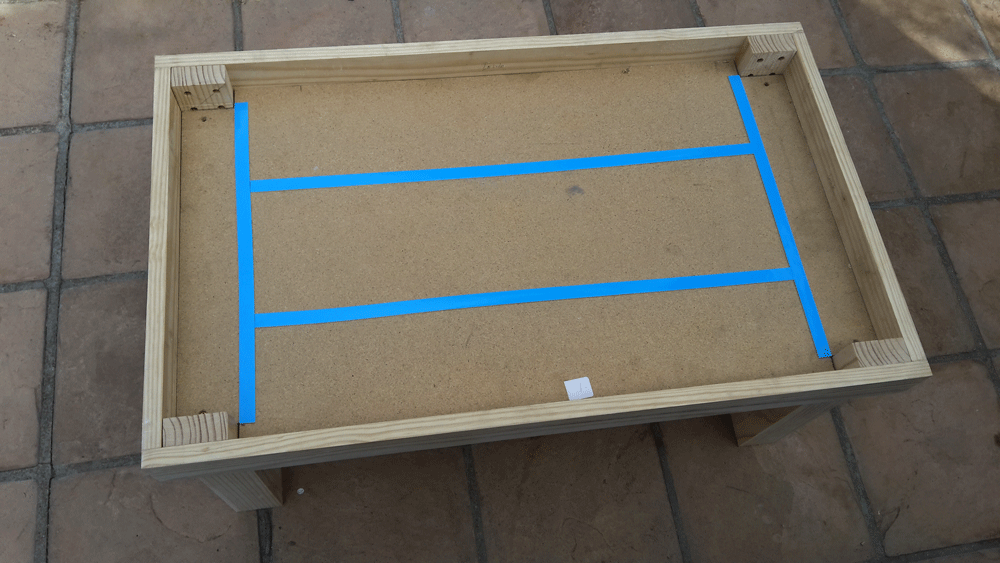
 Size the fiberboard to fit the inside of the box (making cutouts for the legs). The board will rest on the shorter part of the legs and should be fixed with screws as per the above image.
Use double-sided tape to secure the mirror to the base.
The mirror should be cut to size to fit between the protruding legs and about 1/2-1″ from the inside of the box.
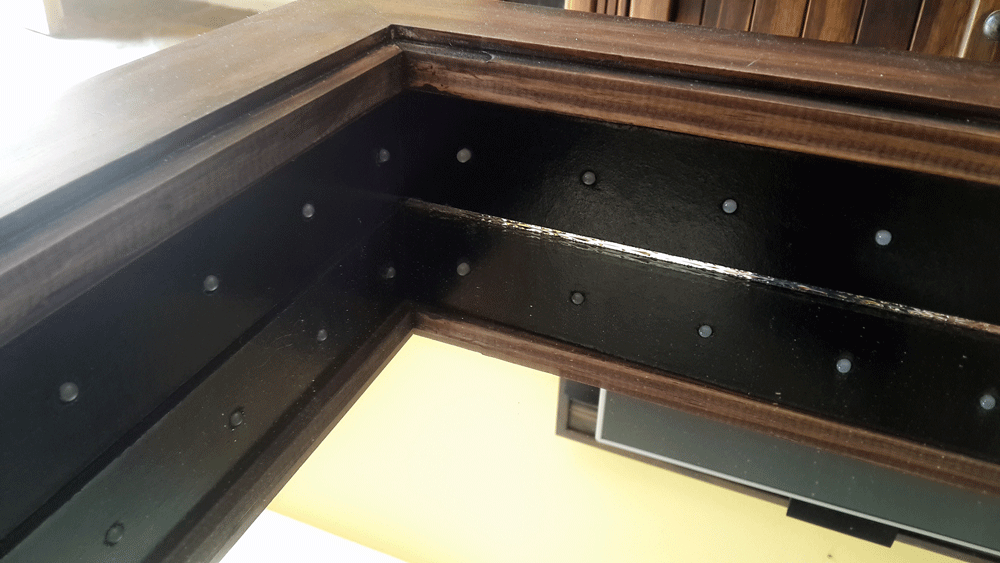
Step 5 – Fit the LED's
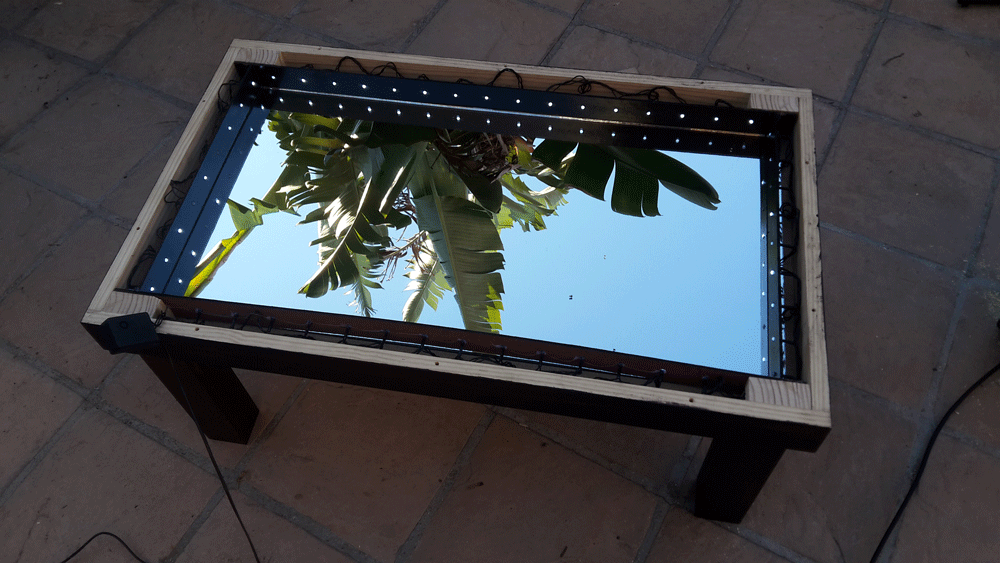
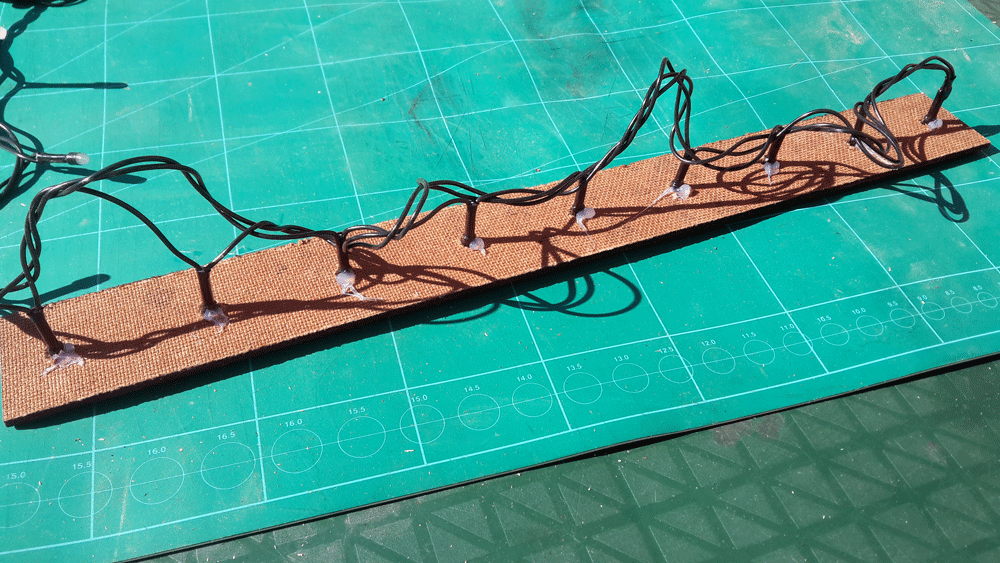 The inner box to house the LED's is built using a thin fiberboard that gets cut to size, painted using black spray paint and fitted using hot glue and a glue gun. Before fitting the inner box the LED's are glued into holes drilled to the size of the LED's you intend on using.
Many people opt for LED strips or rope lights as this is faster and more convenient during the building process. The downside of this, however, is the visibility of the strip or rope light housing when the infinity effect is actuated on the completed table.
Step 6 – Top frame
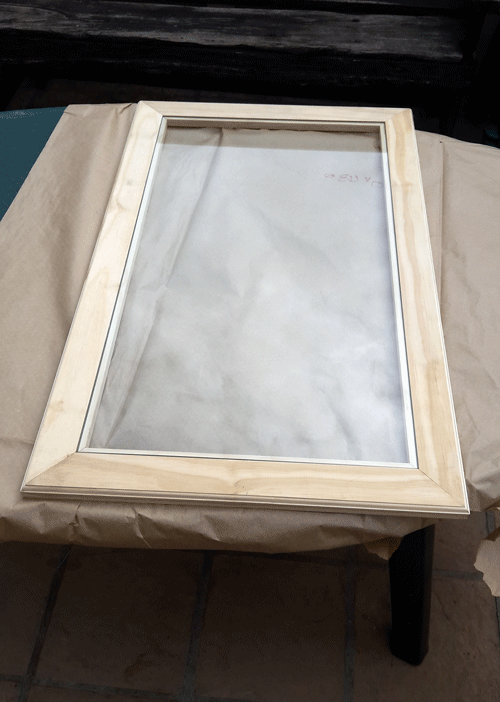
The top frame will be the face of your table and the first thing people will notice when looking at your project.
Assemble this frame to be a 1/2 inch wider and longer than the box and so creating an appealing overhang when assembled.
Using a router with a straight bit, cut a recess on the inside of the frame for the glass. This is ideally done before assembling the frame.
The depth of the recess should be the thickness of the glass you are using so that when the glass is in place the top of the frame and the glass should be flush.
For this table, we used 1/4″ thick tempered glass.
In addition, cut a decorative pattern around the outer edge of the frame using a profiled bit.
The joints are glued together miter joints.
After assembling the frame, test fit the glass. Remove the glass again, sand down and treat the frame to match the rest of your table.
The frame can now be fitted to the already constructed table base.
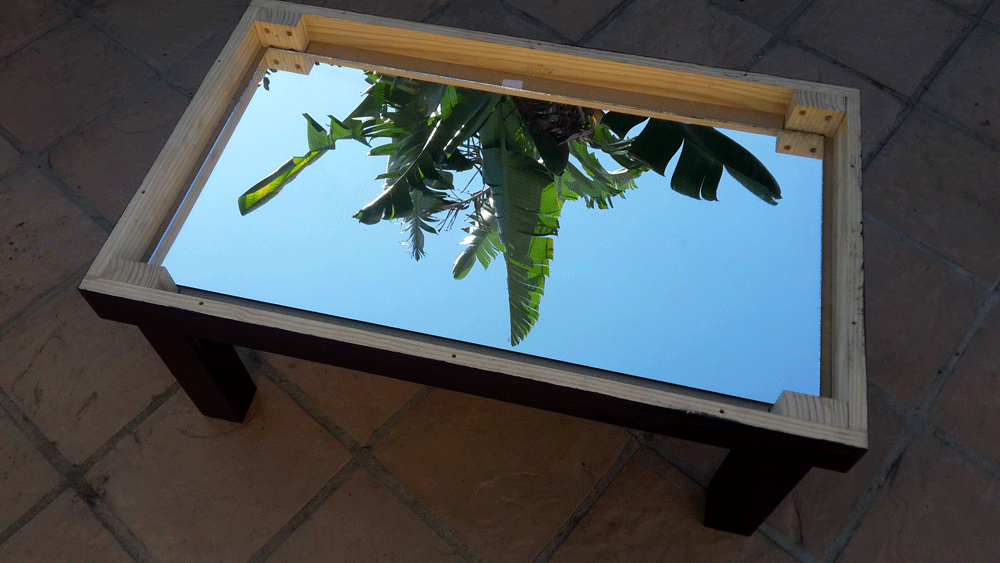
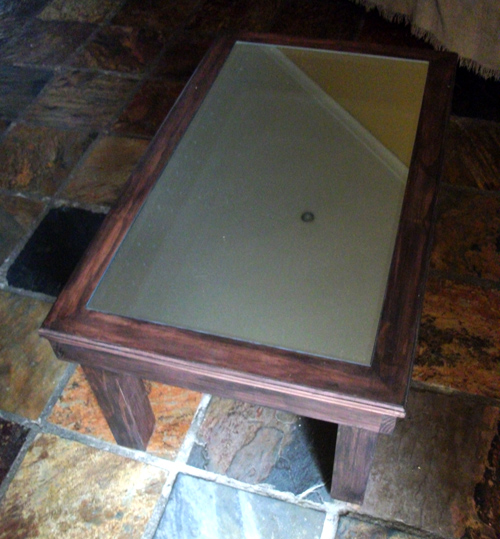
Step 7 – Add the tint

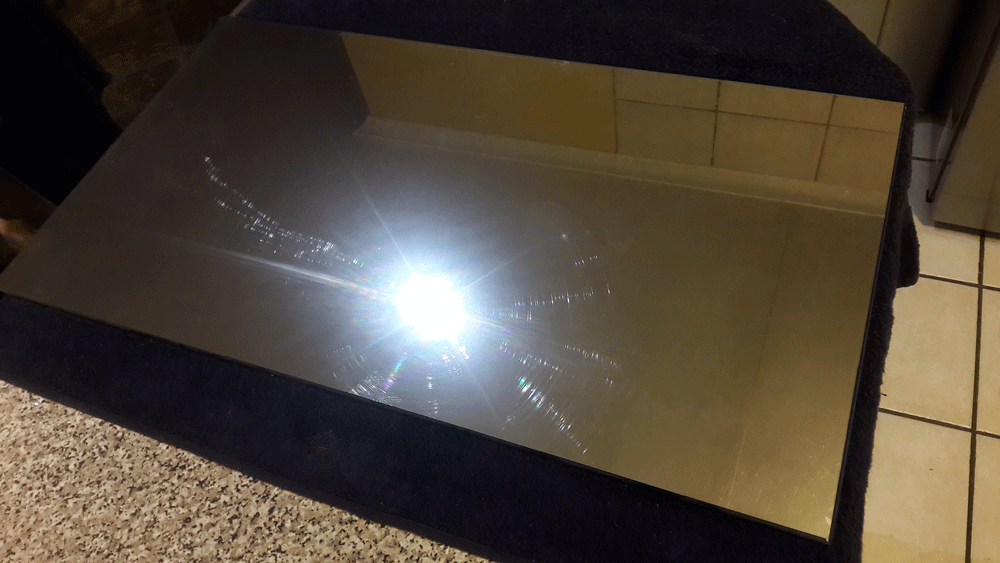 The last step will be tinting then glass to a mirror finish.
The tint should be slightly transparent to allow a small amount of the light to pass through it. When the tint is applied the glass can be fitted on the table.
For our table, we used silver automotive tint. When the tint is applied the glass can be fitted back on the table and the infinity table will be complete.
Happy building!
Completed!
 Woodworkjunkie.com, DIY like a pro.
If this post was helpful or if you have any suggestions, please let us know by leaving a comment below.

how to make illusion table with design
Source: https://woodworkjunkie.com/an-infinity-mirror-coffee-table-building-tutorial